Your crafting supplies and tools are investments. Fun investments, to be sure, but still something that you want to get the most use from. Any time I discover a new way to use something I already own is a HAPPY time! It makes me do cartwheels! And today, I have 2 ideas to share with you that will help you s-t-r-e-t-c-h your supplies.
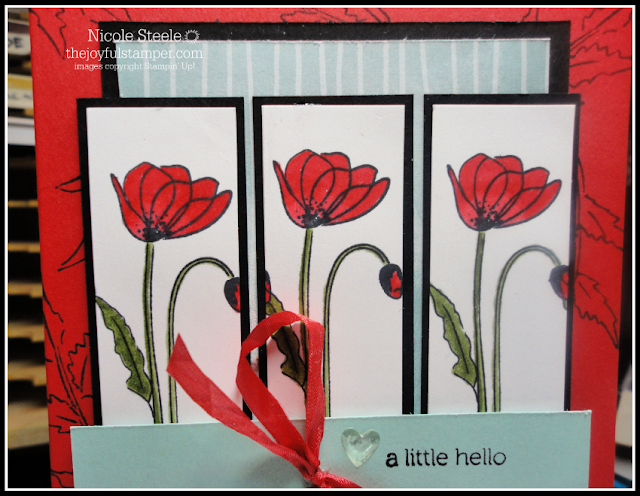
Trick #1: Stamp your image three times on a 3" wide piece of cardstock, then use your Stampin' Trimmer to cut into 3 equal 1" wide sections. For maximum impact, mat each 1" section onto a 1-1/4" wide cardstock mat. The triple repetition is a stunning eye-catcher!
In my example, I stamped an image from Painted Poppies in Memento Tuxedo Black Ink on Whisper White cardstock, then used Stampin' Blends to color them (Light & Dark Poppy Parade, Light & Dark Mossy Meadow).

Trick #2: While you have your Stampin' Blends out, use them to custom color ribbon! Lay the ribbon flat on Stampin' Grid paper to protect your work surface, then run the brush tip of the Stampin' Blend marker down the ribbon. The color will transfer instantly and smoothly and also dry quickly.
The ribbon in my example is Whisper White Crinkled Seam Binding and I used a Dark Poppy Parade Stampin' Blend on it. Look at the vibrancy of that ribbon! One spool of Whisper White Crinkled Seam Binding Ribbon + your favorite Stampin' Blends colors = a rainbow of options!

Here's a Behind-The-Scenes story that you probably can relate to: I faced major indecision over what color to stamp the background on the Real Red cardbase. At first, I was going to use the same color ink so that the background would be subtle. But then I thought how striking stamping it in Tuxedo Black would be, especially with the Basic Black mats. No joke, I spent 10 minutes going back-and-forth over this! I violated my own design rule of NO OVERTHINKING. Finally, I scolded myself for doubting my instinct (and wasting precious stamp time) and went with the Tuxedo Black - and LOVED it!!
Watch the video to see this card made from start to finish.
If you are enjoying The Joyful Stamper site:
- New to stamping? Welcome! The Beginner Brochure was designed for you. Also check out this card for a perfect first dip into cardmaking. I can mail it to you with a free catalog package - just email me at nicole@thejoyfulstamper.com to request one.
- High-quality stamping products make your crafting experience better so don't cheat yourself! Shop my store for your crafting supplies!
- You'll love my crafting videos on The Joyful Stamper YouTube channel! Subscribe while you're there and click the bell so that you always have fresh inspiration.
- Looking for community, a hobby, or a way to make extra money? My team of My Joyful Stampers has a place for you (and the Starter Kit is the especially ULTIMATE bargain right now)! Read more here.
Thank you for choosing me as your demonstrator! I appreciate your business!


No comments:
Post a Comment