Monday, September 30, 2019

Project Sample Ideas Plus Last Day for DSP Sale

Did you ever get a coupon for something you love to use and maybe even needed?  Then go to the store or shop online for said item and checkout?  And remember later that you had an amazing coupon for that item you forgot to use?  UGH!!  Not a pleasant feeling.

I don't want you to experience that here.  I want you to feel like a smart shopper who remembered to use her coupons, who remembered the awesome sale!  Which is why you need to know that many stamping-related things are down to their final 24 hours.  Today is it!


Buy 3, Get 1 Free Designer Series Paper sale with Nicole Steele, The Joyful Stamper
  
Check out these samples below that use some of this gorgeous paper!


Mini house photo album; click here for post
mini house photo album by Nicole Steele, The Joyful Stamper

 Birthday card using DSP scraps; click here for post
Birthday card using DSP scraps by Nicole Steele, The Joyful Stamper


 Bird Ballad notecard set; click here for post
Bird Ballad Notecard set by Nicole Steele, The Joyful Stamper

 Bird Ballad notecard set; click here for post
Bird Ballad Notecard set by Nicole Steele, The Joyful Stamper


 Bird Ballad notecard set; click here for post
Bird Ballad Notecard set by Nicole Steele, The Joyful Stamper


 Bird Ballad notecard set; click here for post
Bird Ballad Notecard set by Nicole Steele, The Joyful Stamper


Kindness card using die-cut Bird Ballad DSP scraps 
Click here for post.
Kindness card using Bird Ballad DSP scraps by Nicole Steele The Joyful Stamper


Bird Ballad and Dinoroar

Bird Ballad and Dinoroar Designer Series Paper and project samples - shop with Nicole Steele, The Joyful Stamper!


 Magnolia Lane and Garden Lane 
Magnolia Lane and Garden Lane Designer Series Paper and project samples - shop with Nicole Steele, The Joyful Stamper!


Pressed Petals and Come Sail Away
Pressed Petals and Come Sail Away Designer Series Paper and project samples - shop with Nicole Steele, The Joyful Stamper!


 See a Silhouette and Follow Your Art
See a Silhouette and Follow Your Art Designer Series Paper and project samples - shop with Nicole Steele, The Joyful Stamper!


 Woven Threads and Perennial Essence
Woven Threads and Perennial Essence Designer Series Paper and project samples - shop with Nicole Steele, The Joyful Stamper!


It's also the last day to get a free tutorial for this amazing Halloween wreath!!
Use Host Code RCRTAFKX  if you order is under $150 to receive this tutorial.  If your order is $150 or more, do not use the host code - you'll get the tutorial AND Stampin' Rewards (free Stampin' Up! product of your choosing)!
Free tutorial for amazing Halloween Wreath made from coffin boxes!  Nicole Steele The Joyful Stamper


I put together a very detailed, step-by-step tutorial with lots of photographs.  You'll love it and you are going to love this wreath!  I was showing it to everybody when it was finished because I was so excited!  Click the image below for the supply list.


click here for Halloween Coffin Wreath supply list by Nicole Steele The Joyful Stamper

Don't forget to use Host Code RCRTAFKX if your order is under $150!  That is how I know you want the tutorial.  If your order is $150 or more, do NOT use the host code and you will get the tutorial AND free Stampin' Up! product of your choice (Stampin' Rewards)!

Click here to shop with Nicole Steele, The Joyful Stamper!

 Thank you so much for the opportunity to earn your business!  I love bringing you tutorials, tips and techniques, and fun project ideas.  Your orders are what make it possible to do so!  Thank you!

Friday, September 27, 2019

Trio of Adorable Paper Pumpkins!

I fell in immediate love with these cute little pumpkins!  I gave the first set to Emma who wanted them for her dorm room.  I missed them so much that I made a second set and created a tutorial for all of you, friends!  Please excuse my well-loved tools and supplies - I'm sure we all have a few of those, right? 

Trio of Paper Pumpkins by Nicole Steele The Joyful Stamper


 The Supplies You'll Need
Stampin' Up! supplies needed for paper pumpkins by Nicole Steele The Joyful Stamper


 Stamp leaves in Cajun Craze and Crumb Cake on the same color cardstock, using the largest leaf image from the Gather Together set. 
Die-cut leaves with Gathered Leaves coordinating die.
Die-cut scalloped circle from Early Espresso cardstock using Layering Circles dies.
die-cut scalloped circle and leaves using Stampin' Up!'s Layered Circle and Gathered Leaves dies - Shop with Nicole Steele


Cut skinny strips of Garden Green cardstock.
Use bone folder to gently curl.  
use bone folder to curl cardstock to make pumpkin vines - Nicole Steele The Joyful Stamper


Use Braided Linen Trim to tie a bow.
Gently pull apart fibers to create a more rustic look.
Tie bow with Braided Linen Trim and pull apart fibers to create rustic look - Nicole Steele The Joyful Stamper


To make the pumpkin stems, use a bone folder to soften the fibers of a 1" wide piece of Early Espresso cardstock.  This is the same way you curled the vines above.
Once the cardstock feels soft, start in the corner and peel apart the two layers.  
Use bone folder to soften cardstock fibers - Nicole Steele The Joyful Stamper


Using just one layer of Early Espresso cardstock, roll it diagonally into a stem until it's your desired thickness and length.  You'll want to make the stem long enough that you can bend the bottom a bit and glue it to your pumpkin. Glue to hold together.
Roll cardstock diagonally to create stem and glue together - Nicole Steele The Joyful Stamper

Cut (4) 1" x 12" strips of Designer Series Paper.  Place them wrong pattern up (the pattern that will be on the inside of the pumpkin is the one facing up), as shown in the photo.
Staple together in the center.
Staple 1" x 12" Come To Gather Stampin' Up! Designer Series Paper strips in center - Nicole Steele The Joyful Stamper


Bend the strips up to meet in the center and staple.
Fold up Come To Gather Stampin' Up! Designer Series Paper strips and staple at center - Nicole Steele The Joyful Stamper


Glue the die-cut scalloped circle to the bottom of the pumpkin.
Glue die-cut scalloped circle to bottom of pumpkin - Nicole Steele The Joyful Stamper


Turn the pumpkin right-side up.
Bend the bottom of the stem and glue to the top of the pumpkin.  A hot glue gun is highly recommended for this.
Glue stem to top of pumpkin - Nicole Steele The Joyful Stamper


I forgot to take a photo of the next step!  Glue on the pumpkin vines near the base of the stem.

Now glue on the stamped and die-cut leaves.
Glue on leaves to top of pumpkin - Nicole Steele The Joyful Stamper


Glue on the Braided Linen Trim bow.
Glue on pumpkin vines and bow - Nicole Steele The Joyful Stamper


Ta-da!  You have the cutest, easiest paper pumpkins ever!  I put mine on the window sill above my kitchen sink.
Trio of Paper Pumpkins on display - tutorial by Nicole Steele The Joyful Stamper


Trio of Paper Pumpkins on display - tutorial by Nicole Steele The Joyful Stamper


Don't you love those?  I do!  These would be so fun with the Monster Bash Designer Series Paper.  You could have them sitting near your candy display on trick-or-treat night or displayed on a foyer table.  They would be such a cute decorative touch!

If you loved this tutorial, I would so appreciate you shopping with me.  Shop my online store here and don't forget about the recently updated Clearance Rack - there are some serious bargains there (up to 60% off)!


Shop here with Nicole Steele, The Joyful Stamper

Follow Me on Facebook for More Fun!
Click the image!
Follow Nicole Steele The Joyful Stamper on Facebook!


Wednesday, September 25, 2019

Fall Banner

My oldest daughter Emma requested fall decorations for her dorm room a few weeks ago.  Of course, I got to work!  Today, I'm sharing the banner I made.

Fall banner using Stampin' Up!'s Come To Gather suite by Nicole Steele The Joyful Stamper

I apologize that these photos are not as good as what I have been posting.  The camera was temporarily out of commission so my laptop camera had to do.  The banner is what we should be noticing, anyways!  Don't you love it?!?!  Ever hear of a runner's high?  Well, I had a crafter's high when I made this!
  
"F" and "A" of Gather Together fall banner by Nicole Steele The Joyful Stamper

Confession: I used a retired stamp set called Well-Worn for the letters but the Lined Alphabet (item #145908, pg 159 in the Annual Catalog) would be an even better one to use since it's clear (which makes it easier to see where you are stamping).  You could also use letter stickers, if you have any alphabet ones.

"L" and "L" of fall banner made with Stampin' Up!'s Come To Gather suite by Nicole Steele The Joyful Stamper

Each letter panel uses the same components from the Come To Gather product suite.  They are arranged slightly different on each letter panel, though.  I LOVE how those wooden tree tags set off the letters and add a nice contrast to the other elements.  They are in the Tags & Feather Elements pack (item #150455, pg 47 in the Holiday Catalog).

fall banner components using Stampin' Up!'s Come To Gather suite - shop with Nicole Steele The Joyful Stamper

I began my banner by die-cutting, stamping, punching, and heat embossing all the elements (I did not end up using those Pretty Peacock gingham pumpkins - the pattern was too big for the pumpkin sizes).

fall banner instructions for cutting each pennant - Nicole Steele The Joyful Stamper

I put together a short tutorial for you in the photo above to create each letter panel for the banner.  Stampin' Up!'s Grid Paper comes in handy for this part (item #130148, pg 183 in Annual Catalog)!  

Use a hole punch to make a hole in the top left and top right corners of each panel, then string the Crumb Cake ribbon from the Come To Gather combo pack through the holes (item #150456, pg 47 in the Holiday Catalog).

Isn't that a fun banner?  It took an hour to make it and that included design time, so it would be even faster for you!

Supplies To Make This Fall Banner:
  • Gather Together stamp set (item #150589)
  • Gathered Leaves dies (item # 150662)
  • Gather Together Bundle (includes stamp set and dies listed above at a 10% discount; item # 153036)
  • Come To Gather Designer Series Paper (item #150454)
  • Come To Gather Ribbon Combo Pack (item #150456)
  • Tags & Feather Elements (item #150455)
  • Come To Gather suite (includes everything listed above, orderable with just one number; item #153484)
  • Lined Alphabet (item #145908)
  • Stitched Nested Labels dies (item #149638)
  • Early Espresso cardstock (for the banner panels; item #119686)
  • Pumpkin Pie cardstock (for the pumpkins; item #105117)
  • Versamark ink (to stamp the pumpkins before heat embossing them; item #102283)
  • Pretty Peacock ink pad & cardstock (item #150083 & 150880 )
  • Mint Macaron ink pad & cardstock (item #147106 & 138337 )
  • Merry Merlot ink pad & cardstock (item #147112 & 146979)
  • Cajun Craze ink pad & cardstock (item #147085 & 119684)
  • Leaf Punch (item #144667)
  • Gold Stampin' Emboss Powder (item #109129)
  • Heat Tool (item #129053)
  • Multipurpose Liquid Glue (item #110755)
  • Stampin' Dimensionals (item #104430)
  • Glue Dots (item #103683)
  • Tear N Tape (to adhere wooden tags; item #138995
  • Grid Paper (item #130148)
Pick your favorites to order here in my online store.  Use September's Host Code RCRTAFKX on your order and I'll send you a Halloween wreath tutorial that uses our new coffin boxes!  It's my gift to you for shopping with me!

This once-a-year sale ends September 30!
Buy 3, Get 1 Free Designer Series Paper Sale - shop with Nicole Steele


Click image to follow me on Facebook!
Follow The Joyful Stamper - Independent Stampin' Up! demonstrator on Facebook


Monday, September 23, 2019

I Am Grateful...


  • that Honeycrisp apples and apple cider have appeared at my local farmer's market
  • that it's cool enough at night to drink hot green tea and hot chocolate
  • for our local library, its incredible librarians that I've gotten to know over my lifetime (I live where I grew up), and the knowledge I've gained from all its books
  • for authors that are ambitious enough and curious enough to write biographies and historical accounts
  • for the crazy middle school cross country runners I coach
  • for my backyard clothesline 
  • for the pleasure of sleeping on sheets dried on my backyard clothesline
  • for the swing under the huge tree in our front yard
  • that my oldest girl is enjoying her college freshman year
  • for Cherry Coke being a surprisingly acceptable substitute when the local pizza place is out of Dr. Pepper
Do you ever make quick little lists, either mental or on paper, of things for which you feel warm gratitude?  Or maybe its specific people for which you are grateful.  In which case, do you tell them?  It's easier for me to write rather than say what I'm feeling, so I send cards to express my appreciation.

Thank you card using Stampin' Up!'s Magnolia Blooms set - Nicole Steele The Joyful Stamper

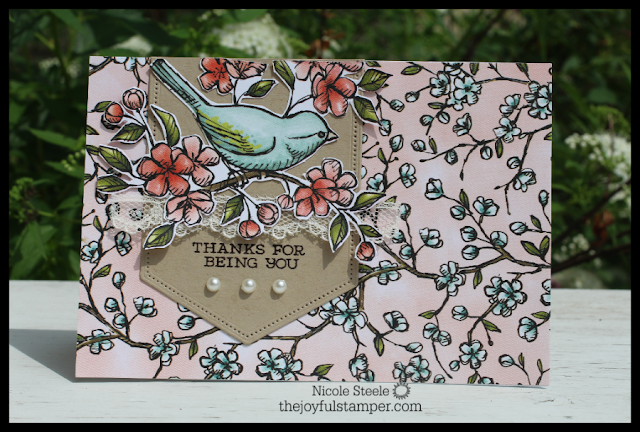
I used the Magnolia Blooms stamp set from Stampin' Up!'s Beginner Brochure along with a color scheme of Petal Pink and Basic Gray to make this thank you card.  I thought the pattern from the Bird Ballad Designer Series Paper (DSP) pack looked pretty with the flower image. 


close up of thank you card using Stampin' Up!'s Magnolia Blooms set - Nicole Steele The Joyful Stamper

Stampin' Blends alcohol ink markers were used to color the flower and leaves.   And how gorgeous does the delicate edge of the Ornate Frames die look with the font of the sentiment?! 


Customer thank you cards using Stampin' Up!'s Magnolia Blooms set - Nicole Steele The Joyful Stamper

I had customer thanks yous to send out, so I made several.  I hope they love these!  

Tip to easily create the DSP triangles
 - cut 2 squares or rectangles of any size from DSP (you can use dies, punches, or a paper trimmer)
 - cut first shape from bottom left corner to top right corner, with desired pattern facing you
 - cut second shape from bottom right corner to top left corner, with desired pattern facing you
 - adhere to cardstock, as shown on my cards (I glued mine to Petal Pink and Whisper White cardstock panels)


Magnolia Blooms set item #152729


Bird Ballad Designer Series Paper item #149592 (part of the Buy 3, Get 1 Free DSP sale!)
       --------------->Click here to see other cards made with this paper

Ornate Frames dies item #150664

Shop Stampin' Up! with Nicole Steele

Don't forget to use September Host Code RCRTAFKX for a free 10-page Halloween wreath tutorial

Thank you for shopping with me!  I so appreciate your orders!  
Follow me on Facebook for behind-the-scenes stamping shots, Lives, and impromptu polls! 

Friday, September 20, 2019

It's Always Better in Person (Video)

Do you have a New Catalog ritual?  I do.  

I lay on our living room floor on my stomach, notebook and Post-It notes to my right, favorite pen in hand, and whatever beverage I'm craving at the moment by my side.  I s-l-o-w-l-y go through the catalog, poring over every sample, dog-earing the pages of the ones I want to recreate.  At the same time, I write down every single thing that pushes my want button.  This is not the time to be practical - if I like it, it gets written on the Wish List.  

I love flipping back and forth through the pages, folding corners down, holding it up to my face for a closer inspection.  When ideas pop up, I jot them down on a Post-It note and stick it to the catalog page that inspired the idea.  My catalogs are a tool, an inspiration, and well-loved!

Here's yesterday's Facebook Live.  You'll get to see Holiday Catalog products close-up and out of the package (and seeing it's my second video EVER, please extend grace to me!).  After watching it, make sure to email me at nicole@thejoyfulstamper.com or send me a message on Facebook to request a free catalog package. 


There's so much to be excited about in this catalog!  I'm eager to share the experience with you, so make sure to follow me on Facebook and visit my blog regularly to see projects you can create.  Most importantly, email me at nicole @thejoyfulstamper.com so I can send you your own catalog copy.  Start a new catalog ritual and share the excitement!


Stampin' Up!'s Buy 3, Get 1 Free Designer Series Paper sale!  Shop with Nicole Steele

Shop with Nicole Steele


Wednesday, September 18, 2019

This or This?

This reminds me of going to the eye doctor's for an annual check-up.  He'd swing in front of my eyes these super-sized lenses, then ask me which was clearer, "This one or this one?  A or B? 1 or 2?"  As a child with already uber-thick lenses in my glasses, I was always terrified to give Dr. Cohen the TRUE answer.  I knew it would mean yet another change in my prescription and even thicker lenses!  My 12 year old self was mortified at the cramping of my haute couture fashion style.  Because not seeing clearly was better than relinquishing my status as the Queen of Junior High Fashion, the Trendsetter with a capital T, the jeans pegger of all jeans peggers, the girl with the highest sprayed bangs!

I hope you heard the heavy sarcasm in those last claims.

But this This or That does not have so much riding on it.  


Do you like this card?

Season of Thanks card using Come To Gather product suite by Nicole Steele The Joyful Stamper


 Or do you like this card?

Gather Together card using Come To Gather product suite by Nicole Steele The Joyful Stamper

Both use products from the Come To Gather suite (item #153484) and even have the same layout, but I made one a lighter color scheme and a bit cleaner than the other.  I tend to believe "more is more" when it comes to cardmaking so it is very hard to resist the urge to pile on the layers and embellishments!  

I love the rustic touch of wood, though, in both cards from the Tags & Feathers Elements (item #150455).  A strip of Tear N Tape holds them securely.  

Tags & Feathers Elements from Stampin' Up! - shop with Nicole Steele

The other thing I love about both cards is the Come To Gather Designer Series Paper (item #150454).

Come To Gather Designer Series Paper - shop with Nicole Steele


The colors are so eye-catching!  They are classic autumnal hues but with a vibrant cast.  

Colors in Stampin' Up!'s Come To Gather Designer Series Paper - shop with Nicole Steele

Make sure to return to my blog because later I have a fall banner to share plus cute pumpkins made with paper strips.  Both home decor projects use Come To Gather DSP and the circle wood tags from Tags & Feathers Elements.


Gathered Leaves bundle (stamp set and dies at a discount)

Come To Gather Suite  (everything listed above using one item #153484)


Shop with Nicole Steele and fall in love with Stampin' Up!

Thank you, friend, for stopping by!  I so appreciate the opportunity to earn your business!  Please email me at nicole@thejoyfulstamper.com to request a free catalog package!

Monday, September 16, 2019

The Closing and Opening of Doors

It's Monday, my favorite day of the week, because of its fresh start.  Did you have a good weekend, friend?

Once again, ours was packed with cross country running.  And I loved it!  Both our high school and middle school teams went to one of the largest invitationals in the Mid-West (5000 runners) and it was exciting.  

I've been a runner for almost 30 years.  I competed in track and cross country in high school and in college; raced in local 5Ks post-college; finished 7 marathons; and ran just for health and the sheer joy of it.  Then two years ago I developed problems in my left foot, severe enough that I have not been able to run trouble-free since and eventually I realized the wisdom in giving it up.  That was a hard pill to swallow. 

God is good, though!  Just months after I began experiencing problems, I was asked to coach middle school cross country.  As one door closed to me, God opened a door that allows me to not only stay involved in the sport of running but to be a mentor and a cheerleader to up-and-coming runners!  Working with middle schoolers is a privilege and a joy - they lift my spirits with their goofy antics and while as a Christian I am to seek God's approval only, I will unabashedly confess to feeling a thrill when someone tells me how much one of my middle school runners loves having me as a coach.  Do you know how hard it is to get the seal of coolness from a 13 year old?!?!  I just love how life works and how God works in life.

Today's project matches my elation.
Birthday card using Basic Pattern Decorative Masks and Stampin' Write markers to create a background by Nicole Steele The Joyful Stamper


It's not fall- or Halloween- or Christmas-themed, but it's happy and bright and celebrates something we all have in common.  It's FUN to celebrate those who add pizzazz and love and meaning to our lives!  And it's FUN to be on the receiving end of the attention!

Can you guess how I made the multi-colored, polka-dotted background?  With masks!

Use Stampin' Write markers to color in Basic Pattern Decorative Masks - technique by Nicole Steele The Joyful Stamper

In a previous post, I showed how to heat emboss using the Basic Pattern Decorative Masks (item #150697 pg 35 in the Holiday Catalog).  This time, I experimented with using Stampin' Write markers to color in the masks.  For this background, I did not follow a proscribed pattern.  Rather, I used the colors of Grapefruit Grove, Call Me Clover, Lovely Lipstick, and Basic Black to randomly color in the dots.  Occasionally I'd lift the mask to see what color I felt there needed to be more of, then I'd align the mask again and fill in more dots.


Try coloring in the trees with a white chalk marker for an eerie Halloween effect!  Or how about adding a fall border to a card edge by using Cajun Craze, Crushed Curry, and Cherry Cobbler Stampin' Write markers on the top right stencil?  Gorgeous!

Stampin' Write Markers collections

White Chalk Marker

Basic Pattern Decorative Masks (holiday catalog)

Pattern Party Decorative Masks (annual catalog)


Thank you for stopping by today!  I hope you learned something and were uplifted in the pursuit of your creating.  I so appreciate your business and you choosing me as your demonstrator.

sun


01 09 10